

Dark Furniture Wax on Duck Egg Blue Table
You guys…. I am SOOOOO excited to share this Duck Egg Blue makeover with y'all today.
It was so much fun to do and right up my creative alley.
The kind of piece and paint job I just totally enjoy doing.
And….sadly haven't been able to as much lately. I do hope to change that though!
*This is a sponsored post. See here for full disclosure.
I should warn you, if you are a wood lover….look away. ;)
I painted wood…pretty wood. Well, some of it anyway. I did leave a bit of the natural beauty, however.
You'll see … if you keep looking, that is. ;)
If you look around my blog here, you will find out pretty quickly that I use AND love Chalk Paint a lot.
I even painted my kitchen cabinets and island with it a few years ago.
But FIRST…..this…..

I should also warn…this is a photo-heavy post. I couldn't help it. :)
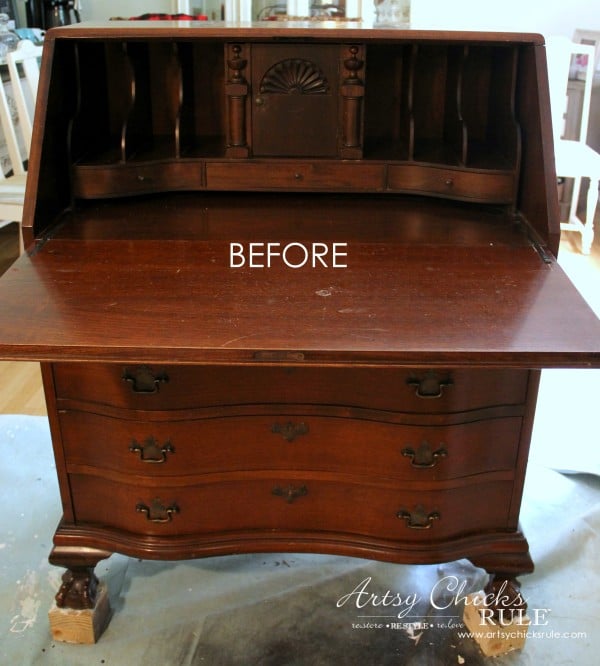
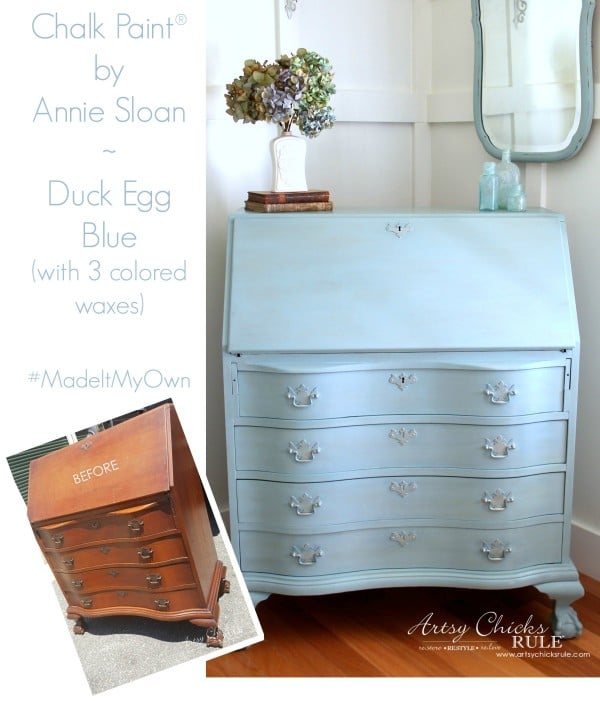
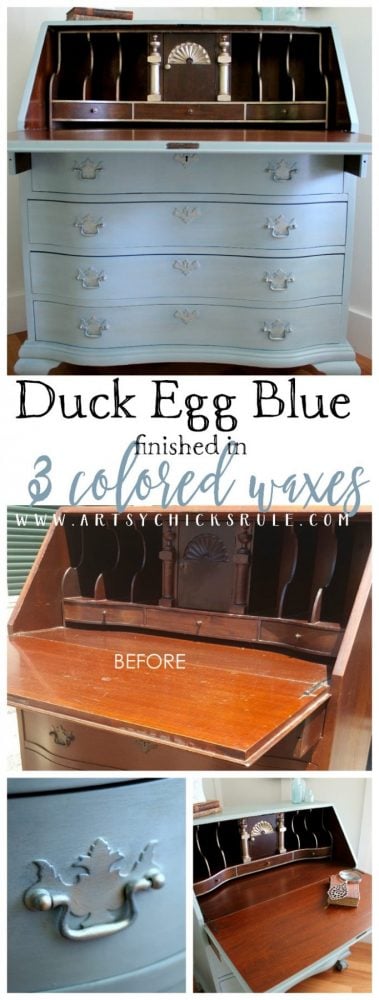
You guys might remember I posted this on Instagram the day I got it from a garage sale.
It was $45.
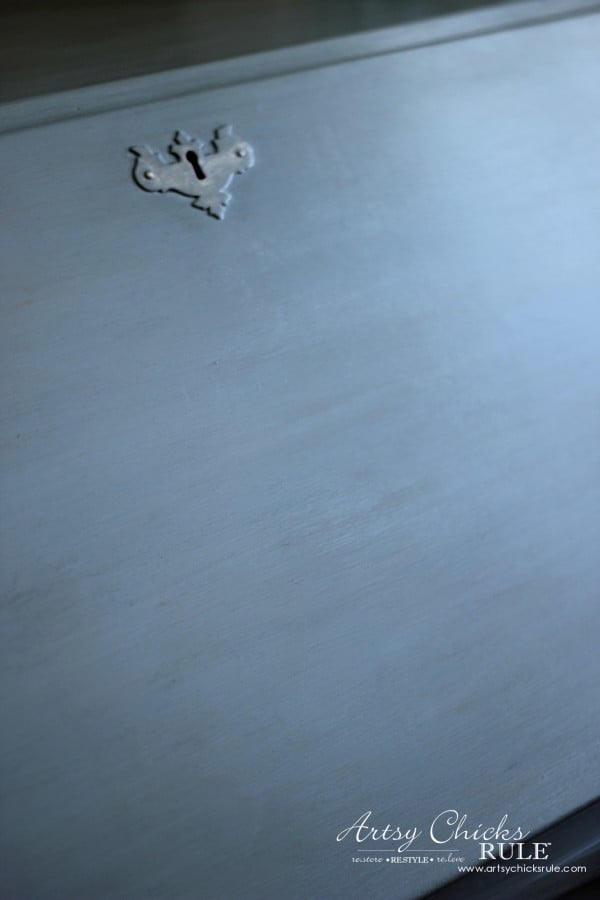
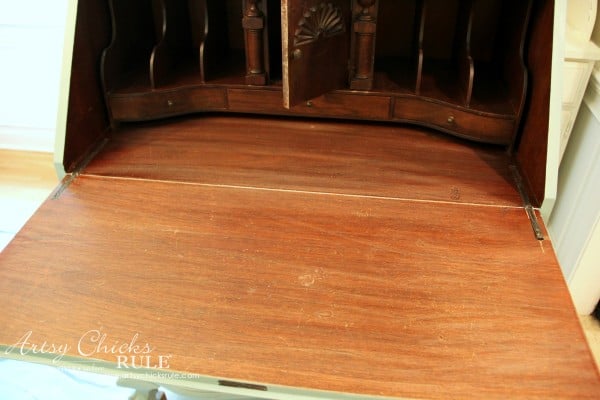
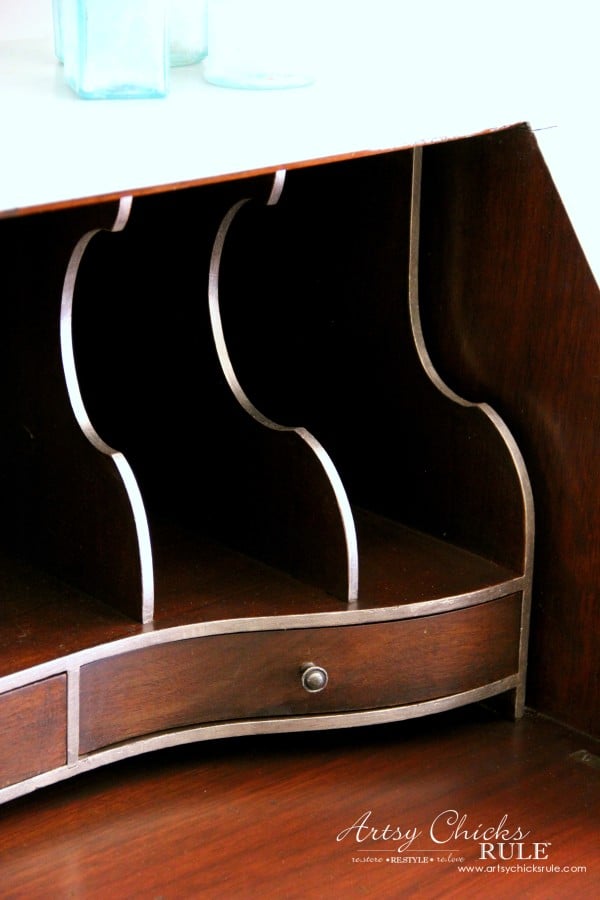
Here is the inside…
Are you new to chalk painting?? This post might be helpful to you >>> "How To Chalk Paint Furniture & More (tips & tricks I've learned!)"
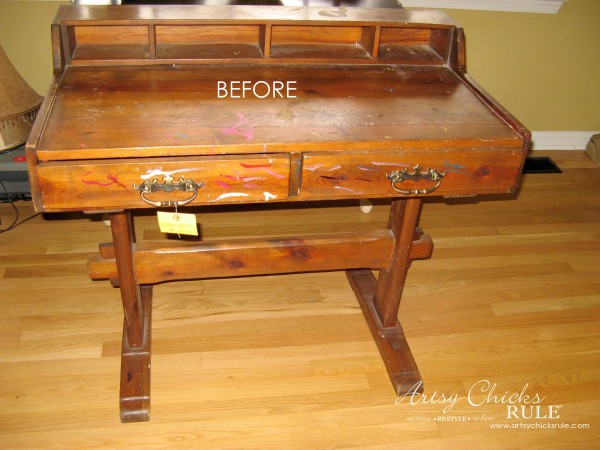
It needed a bit of woodwork…
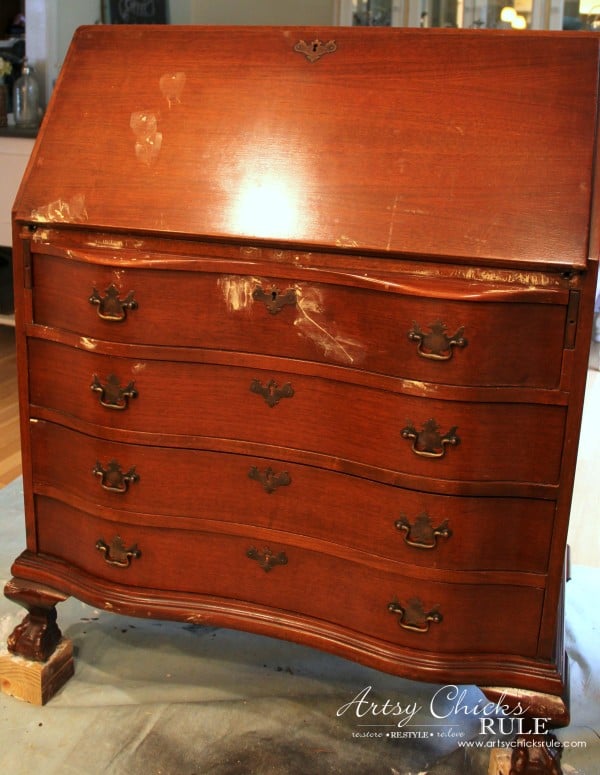
Someone had made marks/lines along the top there and also along the bottom.
Not sure what that was all about.
Plus it had the normal wear and tear.
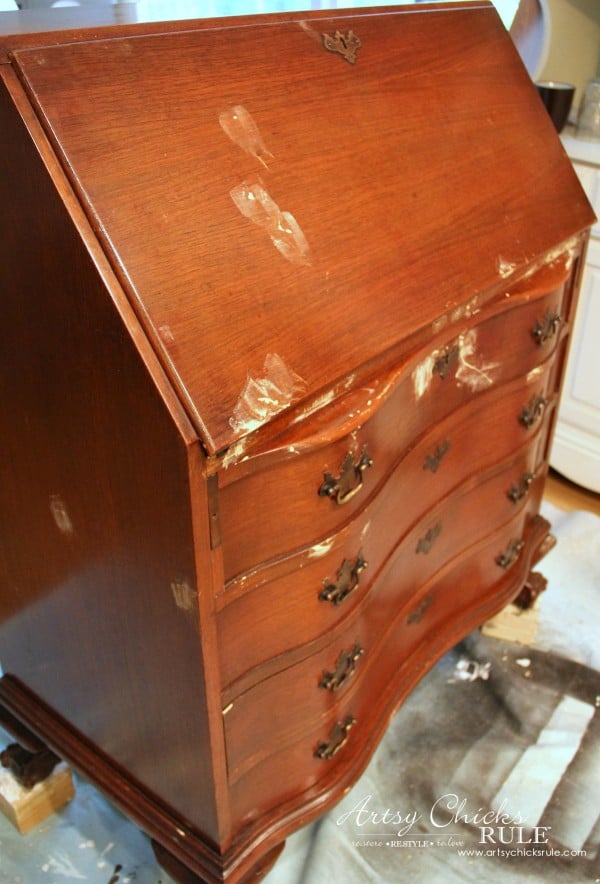
I gave the whole thing a light sanding. (although you don't really need to)
But I decided to give it a quick spray of Shellac since this wood tends to want to bleed through.
I had NONE, ZERO trouble with that. Yay!
As a matter of fact, I could have almost gotten away with just one coat of the Duck Egg Blue that I used.
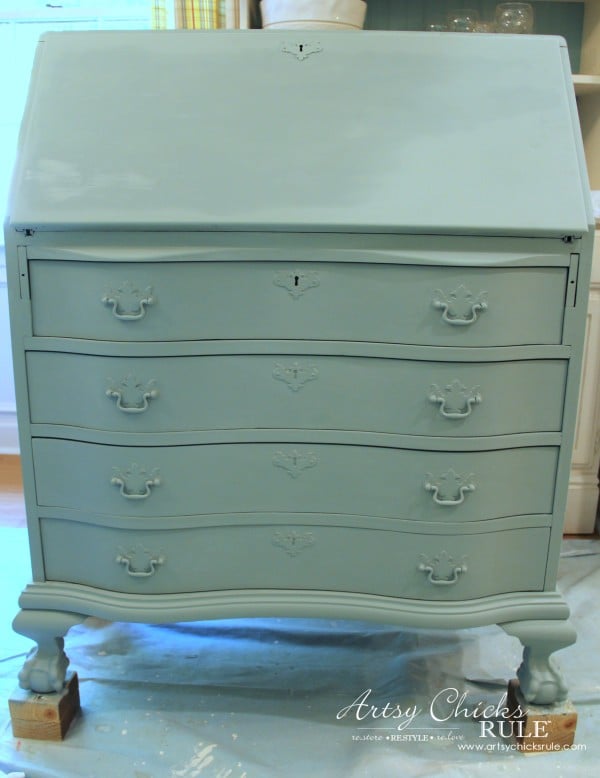
Awesome coverage.
But do you see how flat it and the hardware looks?
That's okay for some pieces but I wanted some depth to this piece….so keep reading. ;)
I went ahead with 2 coats of the Duck Egg.
I love Duck Egg Blue and have used it on many, many things in my home.
(Want to see even more of my favorite furniture makeover supplies??? Take a look at my very own curated shop, here!)
And I used this brush….for the FIRST time!
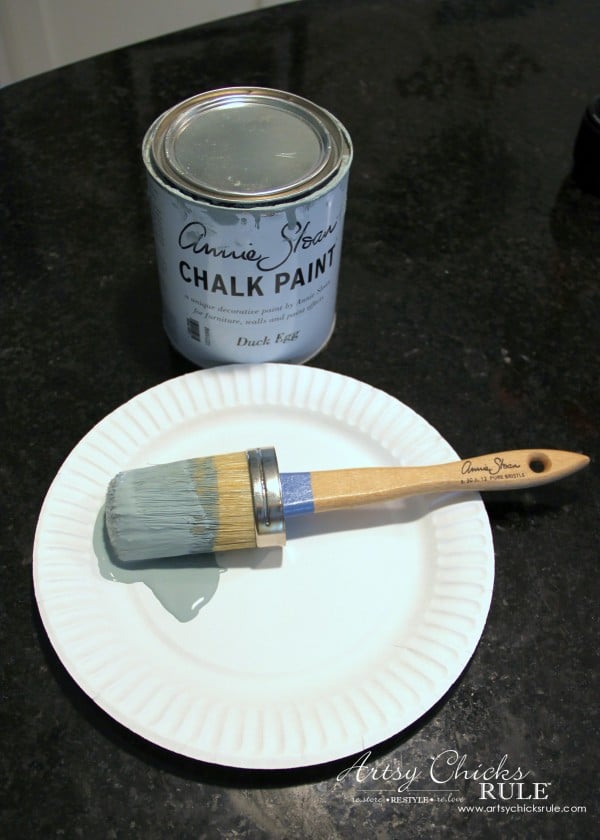
It is the bomb, by the way.
I can't believe I've been painting with Chalk Paint for so long and have never used one of Annie's brushes!
What was I thinking?
I love it.
I had originally intended for the inside of the desk to be French Linen but changed my mind midstream.
(I never do that…ha!)
I wanted to leave behind a bit of the natural wood so decided to leave it unpainted…sort of.
So instead, I embellished it a bit. You'll see. :)
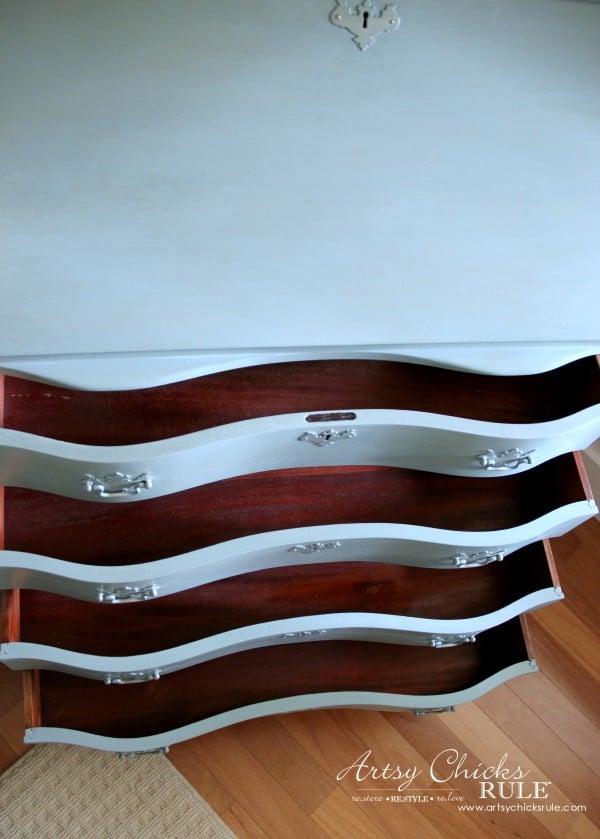
And I also left the inside of the drawers natural.
I had planned to line them with pretty paper but I liked the look of the natural wood.
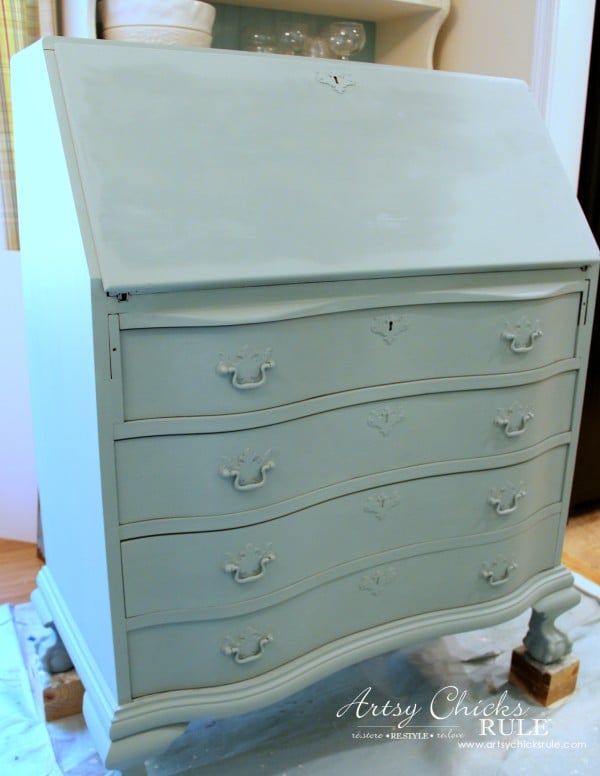
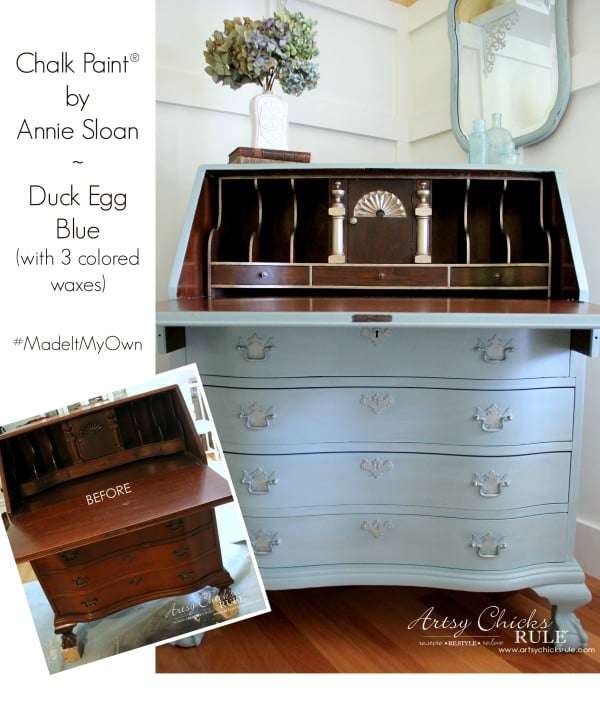
Alrighty, so the photos above show the desk with the Duck Egg only.
I painted right over the handles and hardware.
I had a plan….that evolved as I worked.
Really. I didn't know exactly what I was doing until I was doing it…I love to work that way!
So instead of painting the inside of the desk with French Linen, I decided to make a tinted wax with it to use on the outside.
I started the whole process by applying Clear Wax over the entire piece.
I then applied the French Linen tinted wax in random areas along the entire outside with an old rag.
After that, I applied a bit of Dark Wax (mixed with clear) in the same way (also with an old rag).
Varying the areas I applied it (opposite and alongside the French Linen spots).
You can see below how it looks a bit "spotty" or "dirty".
But it won't look like that when finished.
Once I had applied a good amount of that, I decided I wanted to add a bit more depth in the "blue" department.
So I mixed up a bit of Aubusson Blue tinted wax using the leftover French Linen wax I made earlier.
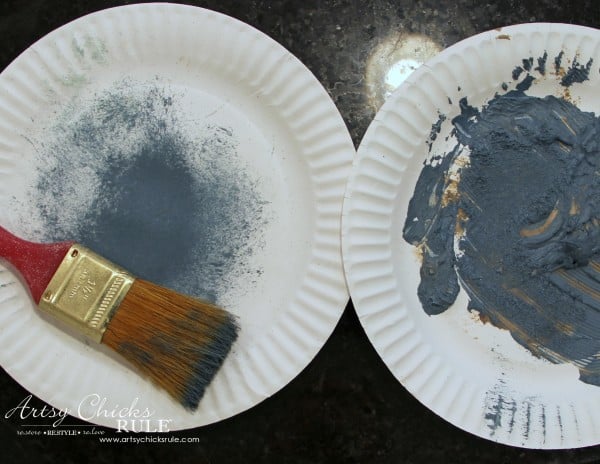
I used a stiffer bristle brush to wipe the Aubusson tinted wax over parts of the desk.
I did this by dipping the ends of the bristles lightly into the wax and then wiping away most of it.
That is why I shared the photo above…to show how I wiped it away on the extra paper plate.
I'm fancy around here. ;)
Then, with a light hand, I brushed over the whole desk.
I applied extra around the edges.
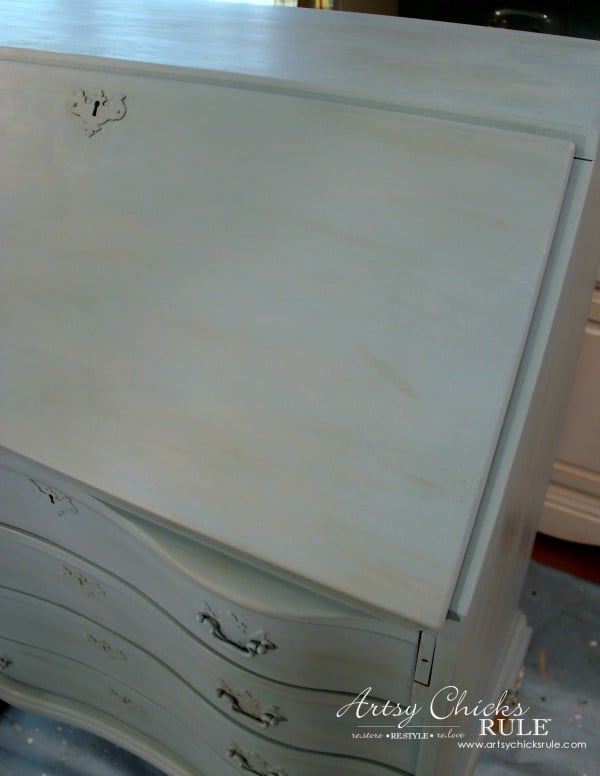
I had planned to sand and distress but used the dark blue wax to give that look instead.

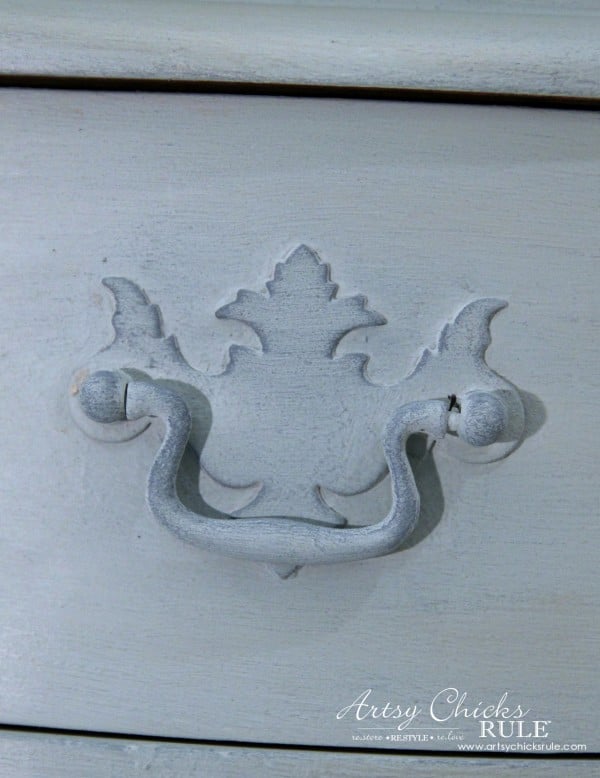
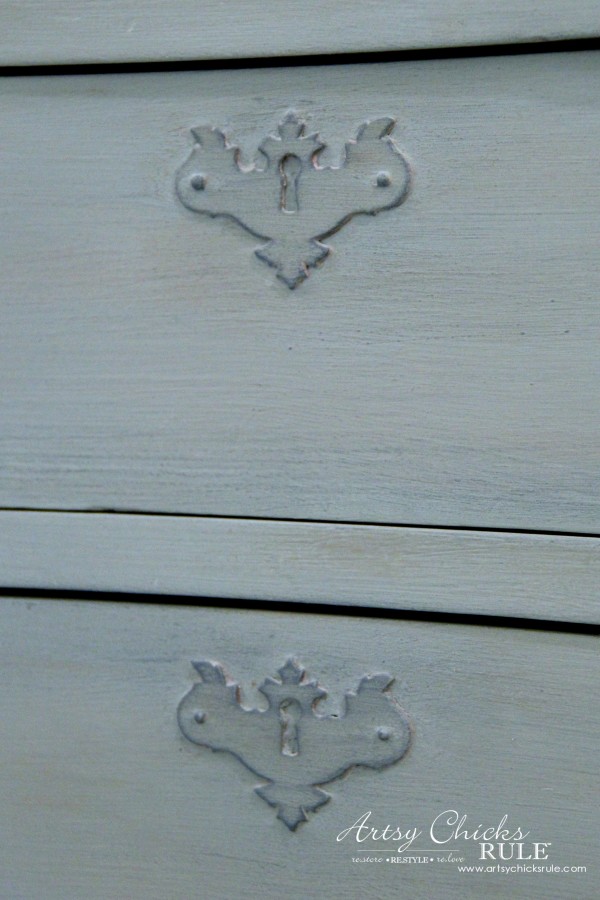
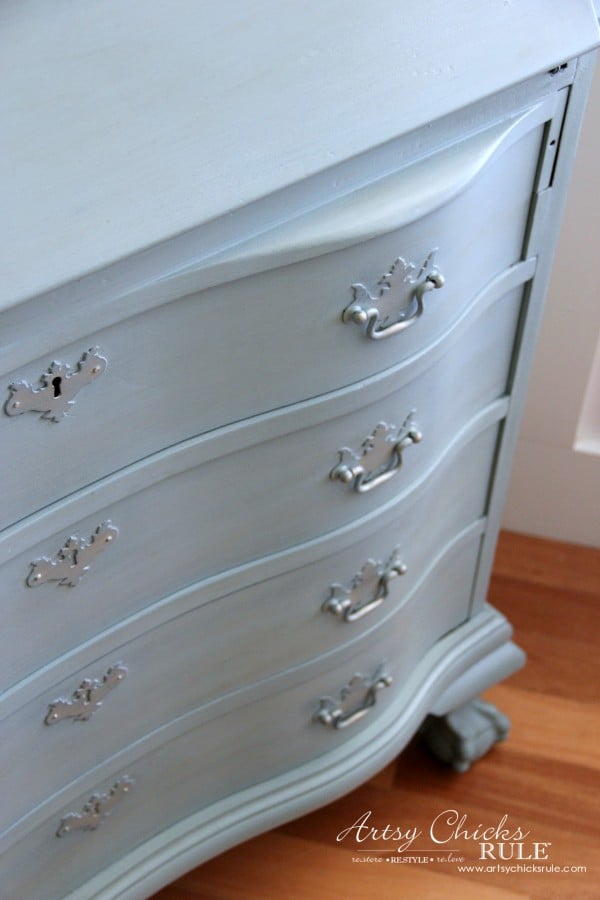
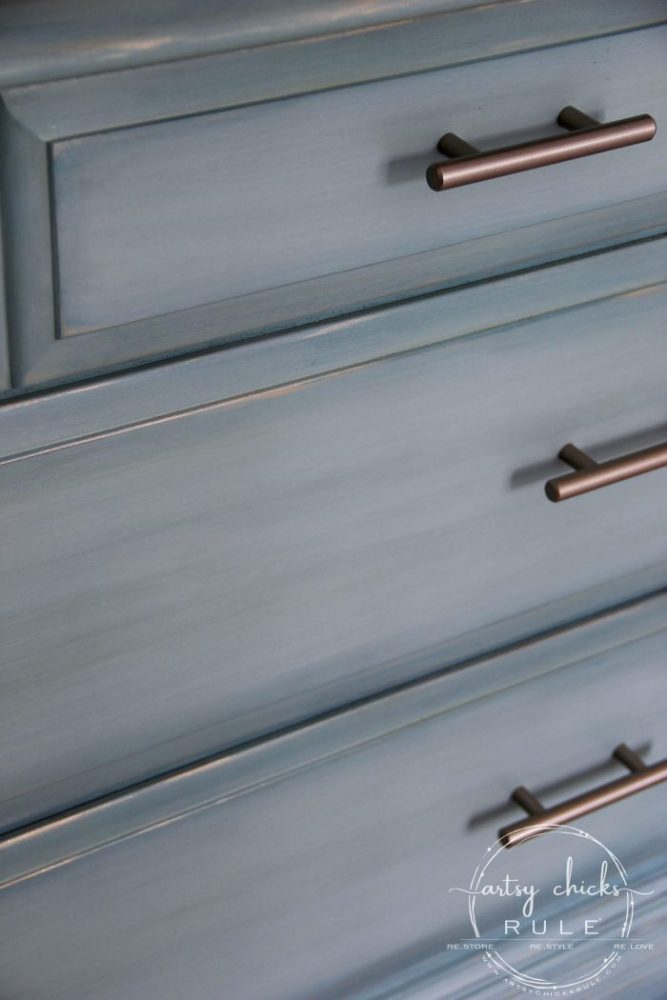
Can you see the lighter beige, darker brown and darker blue in the paint above?
It's very subtle and SOOO hard to photograph.
But hopefully, you can see all three…and how they are somewhat "blended" now.
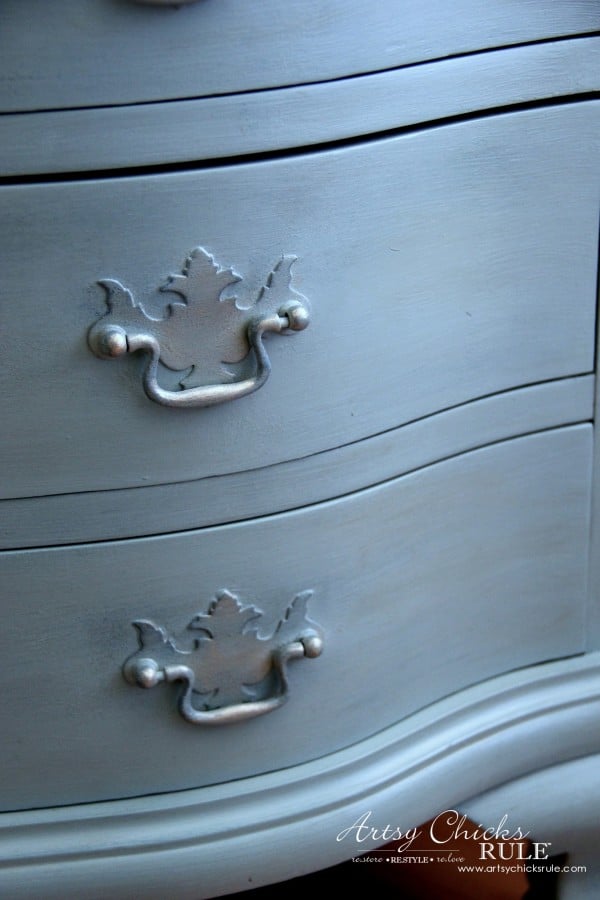
The raised edges of the handles showing the darker blue color in a dry brush technique…
Want to see a VIDEO on exactly how to dry brush? All the ins and outs, here >>> "How To Dry Brush – Video"
And here you can see a bit of the dark and tinted waxes.
Curious about chalk paint?? I wrote an entire post devoted to all the pros and cons of using it, here >>> "Pros and Cons of Chalk Paint For Furniture"
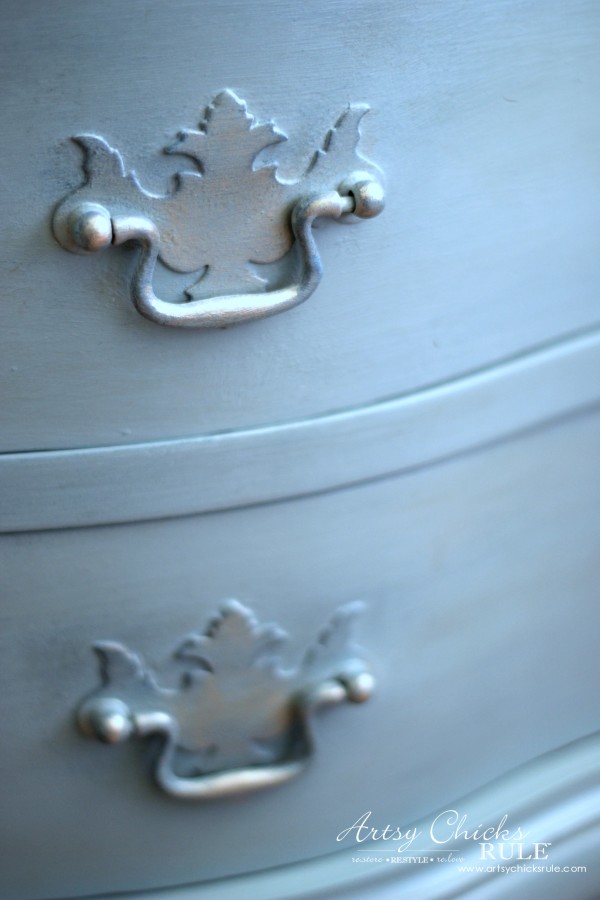
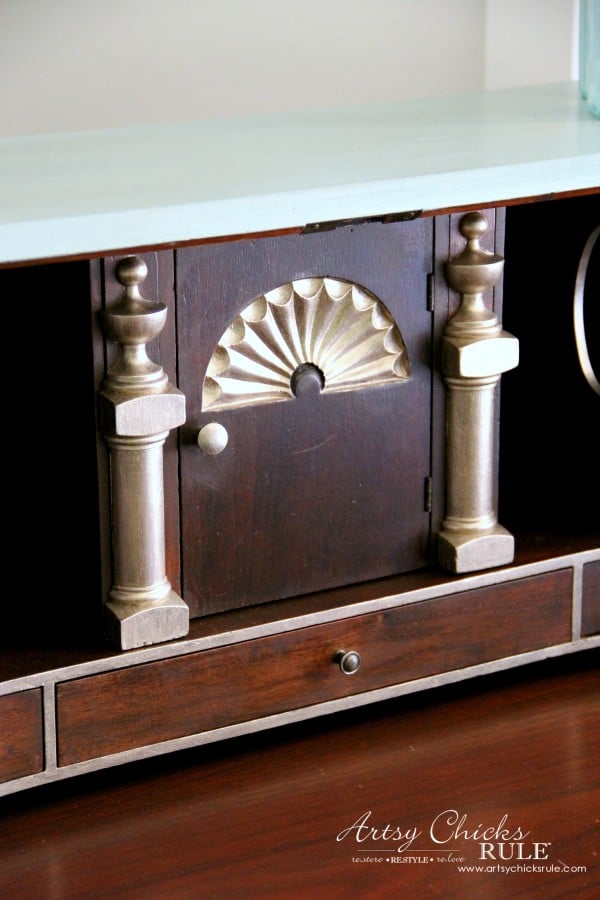
Once I was finished with the Aubusson Wax, I moved onto the handles and hardware.
I used a brassy colored gilding wax to "hit" the high points.
Then I went over that with this bright gold paint.
Use just a tiny bit and (as if you don't have much on your finger) rub lightly over the edges.
Want to see some of these projects in "live" time? Hop on over and follow along with me on INSTAGRAM. I'm always sharing in my stories as I'm doing projects, finding new furniture, fun finds….just all the day to day behind the scenes.
Doing it in layers really gives it so much dimension.
But again, really hard to see that dimension in the photographs.
These photos are all a bit darker so you can see the effect better.
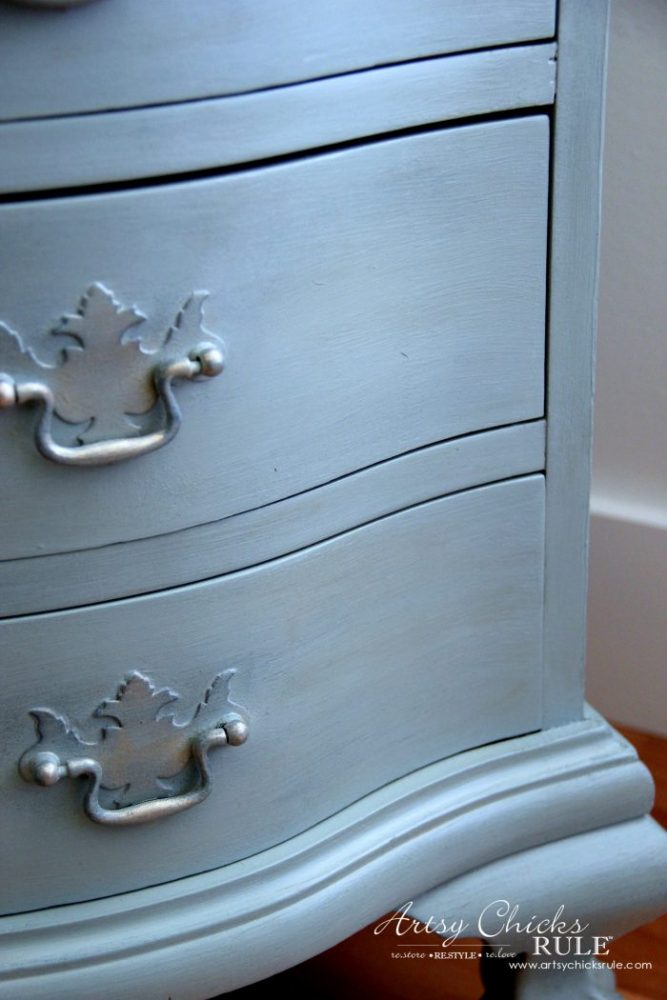
Hopefully, you get the gist of it though.
Adding dimension and depth through paint, wax and dry brushing techniques.
And here she is all done…..
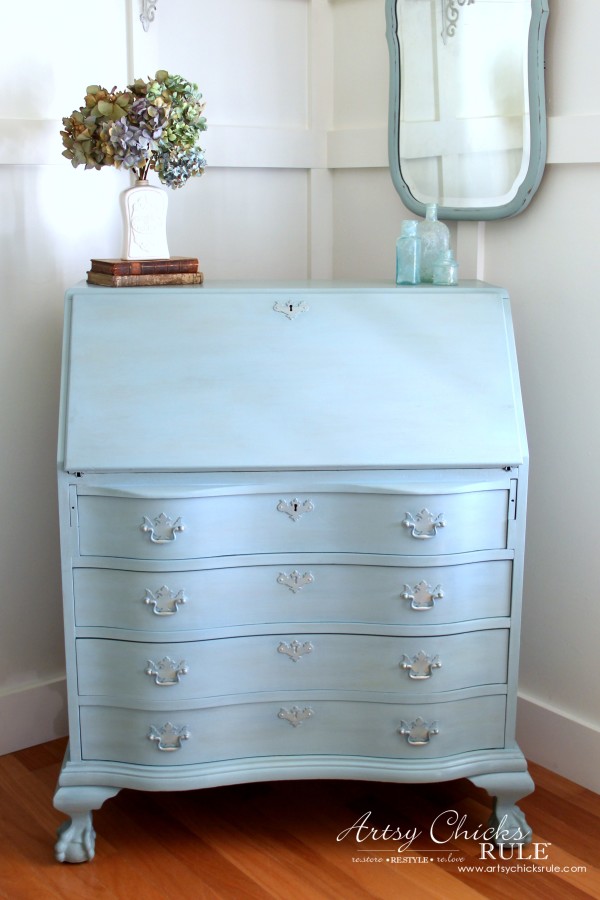
All buffed up and pretty. :)
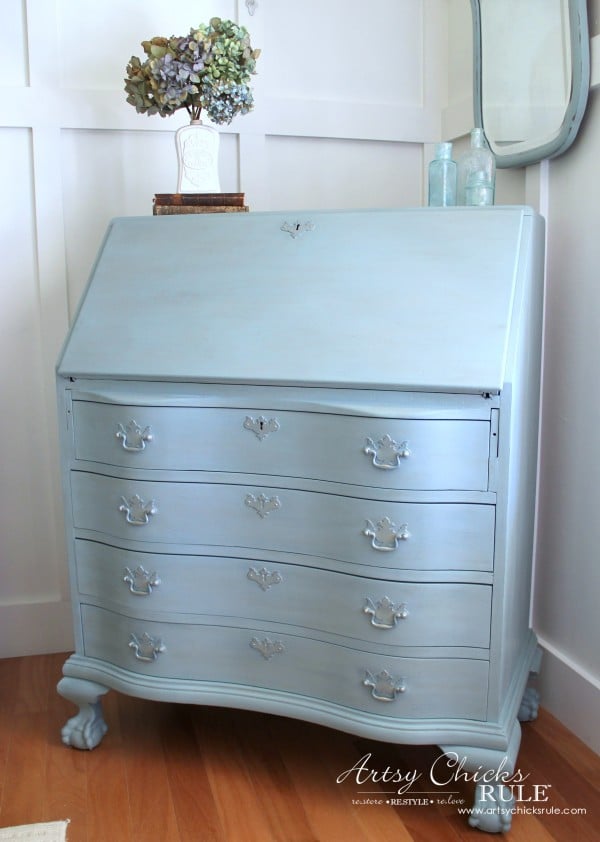
I love her.
I had planned to paint this piece to sell.
But I won't be parting with her.
She's staying right here. I'll find a spot for her somewhere!
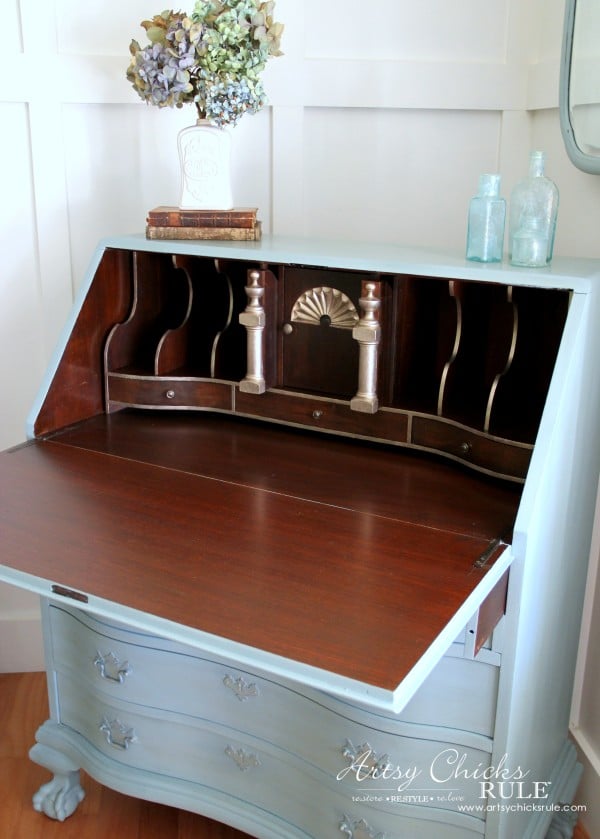
You want to see that snazzy inside now?
With the glammed up embellished interior and beautiful wood?
I gave a light sanding, applied a bit of stain and then a few coats of poly to liven up the interior.
And added a bit of gold embellishment with this paint,too. :)
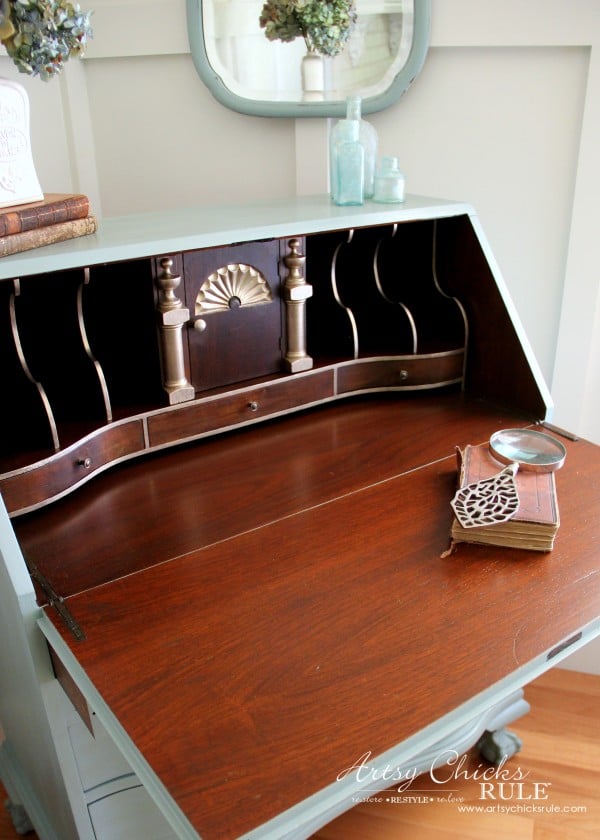
See the 2 "secret" compartments there on either side of the door in the photo below? (the gold "columns")
Those slide out and you can hide things in them. Fun.
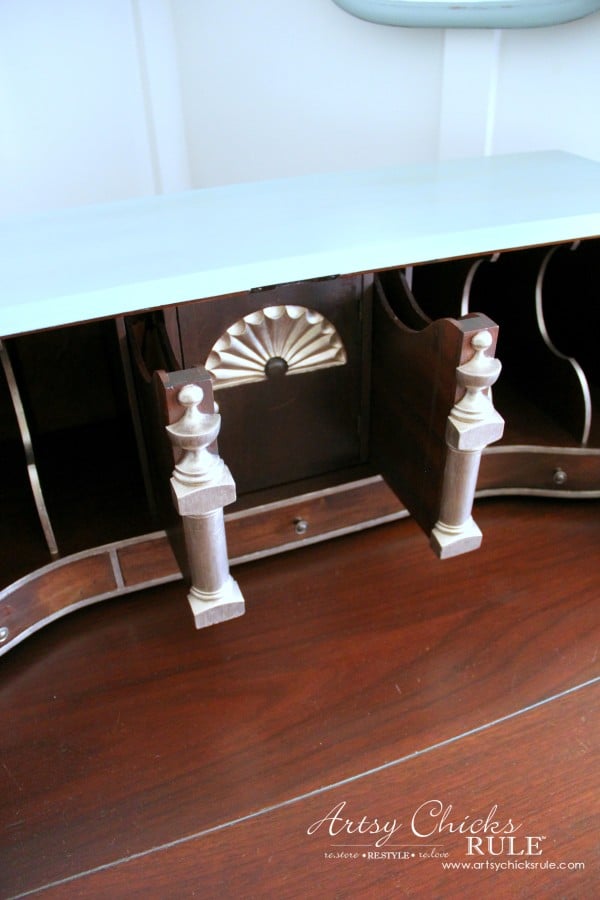
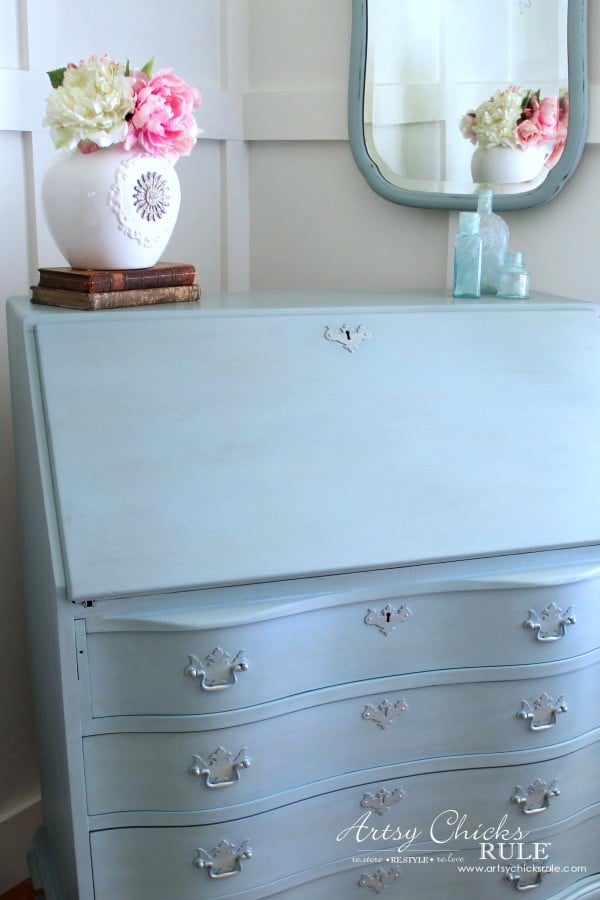
Okay, and just a side note…these hydrangeas are my very first attempt at drying them!
I cut them off of my own bushes this year. I have several more that look a bit better that are still in the "drying" phase.
But I did manage to end up with pretty blue, teal and purple dried flowers in these though. (even if they are a tad sad looking! ;) )
Isn't it amazing what a little gold paint can do?
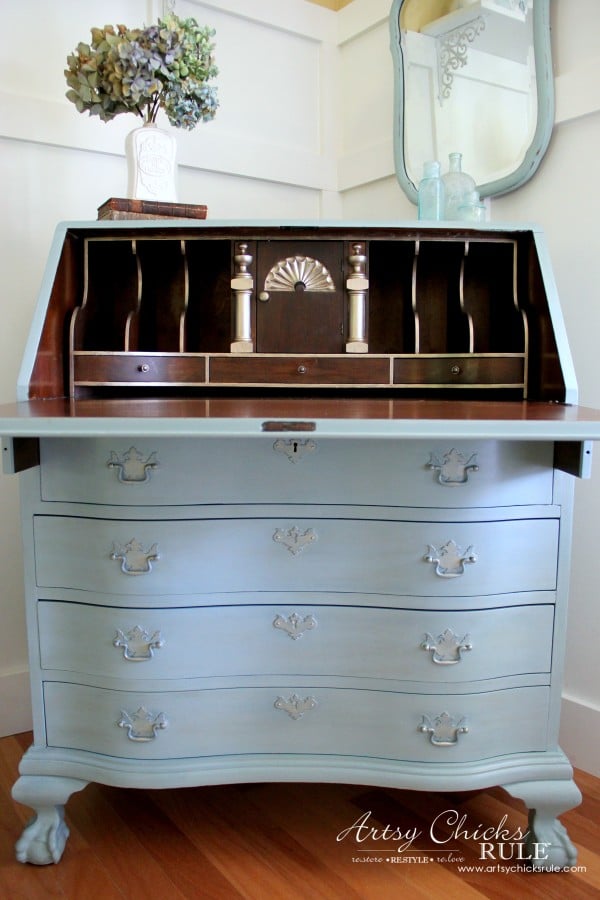
Stunning. The perfect touch.
And the perfect accompaniment to that pretty wood interior.
All of those pretty details were lost without the gold paint…..don't you agree?
![]()
PIN it to save it!
UPDATE: If you loved this and the touch of gold…you might want to check out my latest aqua (also with hints of gold) "coffee bar" dresser….
I used a totally different paint technique on this one! Check it out, >>> HERE.
See you next week with a new "Tuesday Trash to Treasure" …. and …. a new decorating post for our decorating group –>bookcases and shelves! (coastal decor, what else?)
Wait til you see how stinking cute this one is now (and what I did to that top!)!!
UPDATE!!! See it now, here!!
Happy weekend friends!
xoxo

armstrongemptandly54.blogspot.com
Source: https://www.artsychicksrule.com/secretary-desk-makeover-w-duck-egg-blue-3-colored-waxes-chalk-paint-by-annie-sloan/
0 Response to "Dark Furniture Wax on Duck Egg Blue Table"
Post a Comment